Pages

Monday, July 27, 2015


Well hello stampin friends! It's been ages!

 
  As you know, I'm a caker as well as a stamper in my free time between kids, work, summer vacay,..... Sometimes I go between and can't swing both.  This was the case these past few months but it's time to get back in the game! What better way to do so than mixin up the two! So here's a pic of my most recent cake project.  I used the Elegant Butterfly punch on wafer paper and it worked perfectly!  I was very happy with the outcome and I believe the birthday girl and family were too.

For those able to attend, I'll be hosting a workshop combining both baking and stamping on wafer paper and fondant for cupcakes and cookies! I'm very excited! If interested, shoot me an email to RSVP or if you'd like to have one at your home or favorite venue, that can be set up too whether its Stampin Up paper crafting or a combo baking and stampin.  So much fun!

My Stampin Site


   Stay tuned! There will be more to come! Stamping words and phrases is a little bit trickier than punching butterflies.  Tutorial coming soon!  

   Thank you for visiting!!!  


P.S.  The new holiday catalog will be posted soon also! I've had a sneak peek and let me just say, it gets better every year and I think this may be my absolute favorite one yet!! 


  Lots of love,

Sabrina


Tuesday, March 17, 2015


One minute I'm on top of my posts like a crazy person, next months have gone by and no posts!  Sorry to take such a long hiatus but......-sigh-....life.  Gets a little crazy sometimes.

Anyway!! Let's do this!

I finally put together that photo tutorial I promised. Man, taking pics and making notes=easy! Trying to get it done between "mom, can I.....?"; mom will you....?'; "mom where's the.....?" not so much.  Luckily, I give my little one some paper, adhesive, stamps at our craft table he can ink all over and magic happens.  Quiet, peaceful little worker bee.  So it came to be....

I must give credit where credit is due.  I found my guide on South Shore Stamping and tweeked it just a smidge. Thank you South Shore!


First, cut your cardstock 11in x 5in.

Score on the short side at 1 1/2in and 3 1/2in.

Score on the long side at 1/2in, 2 1/2in, 4 1/2in, 6 1/2in.

Next, one of the tweeks, score at 8 1/2in BUT not all the way across.  Stop at the first score line, turn to the other side and stop at that score line.  The middle section should be free of a score line at the 8 1/2in mark. I hope that makes sense.  If you're like me and have to make 2 or 3 more to go Oh! then you'll understand at the end. :-)

Cut off the 1/2in. tabs on the sides leaving the middle section as in the pic.

(notice I cut the tabs off then remembered to take a pic)

Cut off the longer tabs at the other end leaving the middle uncut.  Cut along the other score lines on the sides up to the middle section.  Don't cut all the way across! 

Don't forget your hole!! ;-)  To line up the hole better, I punched some white paper with my 1 3/4in. punch and adhered to the spot I wanted to punch out.  Then I was able to line up my punch around the white paper perfectly without punching through any score lines. Cool, right? No, I didn't make this discovery one the first one, nor the second....we'll just leave it at that.  


Now get to the sticky parts! I used sticky tape, it's my absolute favorite adhesive. I just can't keep enough on hand! Flip the paper to the back side and place your adhesive on the one remaining 1/2in. tab. 

Flip that bad boy back over and place more as shown in the pic below. I really should have used lighter paper. My apologies.  Let's see if I can explain.  The two tabs at end of the longest tab, skip the middle ones, then the next two get adhesive and leave it at that.  Leave it.   I'm trying to help you conserve sticky tape. Now start folding. The tabs on either side of the hole will be tucked into the box which I think adds some support.  Don't forget, that little tab has adhesive on it.  Carefully fold that one in to adhere to the longer tab. 


Viola! Easy right? I thought so. Eventually.  Really, I over thought it at first. Once it's all together, let your creativity take over! 

Here's how I finished off mine. :-) 


I don't know how I got weird lighting, but there it is.   I cut out a strip of DSP 8 3/8in. x 2in.  That 3/8in give you that tiny extra room to curve around those corners.   I scored the first line at 2 1/8in. and then at every two inches after that.  Then wrap it up!
Have fun! I'll be using this set up again for a Mother's Day workshop.  Can't wait!

Moving on folks! 

If you haven't heard yet, Sale a Bration ends soon!  I wish it was extended another month at least!  For every $50 spent before S&H, taxes, you choose a free item! These freebies are great.  No silly or throw away items at all. In fact, most of us went a little crazy and got almost all of them. Then restocked.  Don't judge.


******Important note:  Our beloved Blendabilities have been discontinued.  :-(  They weren't able to perfect the product and rather than offer a subpar item, they pulled them.  The amazing part is they added more items and they are fabulous!  Printed vellum (beautiful), accessory pack (can't get enough of these), and a few super cute stamps.  I told you, nothing but the best! 

So there it is, cool stuff and new stuff.   

Don't be shy, take a stroll around the site. Plan your projects before you order and most importantly, have fun!  I know I do. 

Weekly Deals!  Oh how I love weekly deals.  

If you'd like more info on becoming a Demonstrator, visit my site Here


Aaaand goodnight!!

Thank you friends!!


~~~~Sabrina~~~


Friday, January 23, 2015


Good Morning friends!!  It's a beautiful Southern California morning and I am up way earlier than normal.  It's a cake makin day but a crafter's night tonight! I want to have all the little goodies ready for my youngest son for Valentine's Day. Too earlier? No way. I've barely been able to get those suckers out the door morning of in the past. So, this year, I'm on it! My older two can decide anymore whether they want to participate or not.  We'll see. It's alway last minute.   :-)

Also, if you're local to Riverside or San Bernardino and were trying to decide what to do Saturday, March 28th come on out to....


I'm a Cupcake Competitor!  I participated last year and we all had so much fun! So many goodies with your ticket purchase.  Best of which is a 12 count cupcake container! What's this mean for you? Stroll around the event and snatch up any 12 cupcakes from any booth to fill your container! It's fabulous! Cupcakes galore last year!  Correction: fill up with cupcakes, cookies and cake pops! This will be the first year to have cakes as a category, which I chose not to compete in, so I can't wait to see the entries!  So save the date! You may end up having to eat salads for a week just to make up for the overload of sweets but it'll be worth it!


And we move on....

I had a couple of friends come over for a little Valentine's Day crafting and there ended up being more kids than adults! What made it great was that some of the kids joined in to make a couple of the projects.  I love when they jump in with excitement!  You can see the light bulb click on and they get lost in their own creative world.  I love it. They couldn't wait to share their accomplishments with teachers and parents.  So sweet! 

We made two cards and Kcup holders.  I love 3D projects. They really are my favorite thing to craft. So here's a pic of that...

Cute, right? Tonight I will post the instructions with a pic tutorial.  I've got some caking to do in the meantime.  :-)  We dropped some Hot Chocolate Kcups in these holders and BAM! cuteness. 


This one features one of my absolute favorite stamp sets! The Kinda Eclectic stamp set. Oh and my favorite color with Stampin Up, Blackberry Bliss. I don't know what it is but this color is amazing on everything!  They new butterflies thinlits? Don't even get me started. They are beautiful!


Upcoming workshop project! This card uses the new Lotus Blossom stamp set.  It's a free item in the Sale a Brations catalog with a $50 purchase! This is really a great time to nab all those Stampin Up goodies you've been eyeballin! AND you get to choose a free item from Sale a Brations! It's a win-win.  Oh, just to let you know, some of the Blendabilites sets are in the book of freebies. Just saying.  (Maybe with my tutorial post later I could get a little better pic of this card. This just isn't doing it justice)


Again, if you're in the area (Corona, Riverside) visit my Facebook page to stay in the know on upcoming workshops.  It's pizza, crafting and chit chatting with friends! 


Thanks for visiting and come back soon!!
*****Sabrina


Thursday, January 8, 2015


Back again with another Occasions project! I'm excited to make a few 3D projects in the next few days since I'll have some much needed time off from work.  Really, really looking forward to it.  :-)  I love me some 3D projects! They can be a little more time consuming than cards but they are fabulous! Wonderful gifts throughout the year.  Anyway, that's next time.  This time I wanted to share my swap card. Did I mention how much I loooooove the lumber jack set?  It's real name is the "Wood you be mine?" stamp set but all I see is lumberjack.  Ha!


Don't mind the messy craft table behind it.  It's the sign of a serious (maybe messy) crafter. Right? 
The lumberjack is stamped and colored with the Blendabilities markers and two different shades of green for the trees (there are to different trees stamps). I then cut the same size in vellum, place over my stamped and colored image then stamped the lumberjack with the momento black ink on the vellum.  Gives it a softer look.  For the woodgrain background, I simply inked one side of my woodgrain embossing folder, placed a 5 1/4 x 4 size of natural white cardstock inside and ran through my bigshot.  I love the color it adds to the paper.  To darken the raised portions a bit, I used a cosmetic wedge and lightly brushed it over the entire area.  It was definitely a fun project.  Quicker than you might think.  Perfect for that bearded man in your life! 


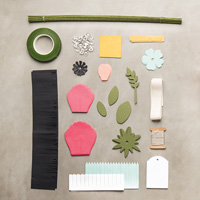
Below is a catalog pic of the bouquet kit Stampin Up offers in the new Occasions catalog. It's gorgeous!  Not only is there a kit, but if you should like to make more or use different or embellishments, etc.  you can buy the Bouquet Bigz L Die and make as many as you like! 
Super sweet for Mother's Day! 

That's my quick post for the day! I plan to be back soon with some fabulous 3D projects and how-tos! Thanks for stopping by!

*****Sabrina

Occasions 2015!

****One more note: The purpose of using the Memento Ink pad here is it will not bleed when using the blendabilities.  It dries quickly and allows you to color over the top without smudging your stamped image.  Remember, any ink on vellum will take a little longer to dry.  Be patient with your masterpiece.  :-)

Weekly Deals!

Like my page on Facebook to stay up to date on future workshops!!
Friends n Stampin!

Tuesday, January 6, 2015


I'm so excited to tell you about the new Occasions 2015 catalog and Sale a Brations!  Is there anything better than free stuff?  And awesome free stuff at that? For every $50 spent in the annual catalog or the fabulous new Occasions catalog, you pick a free item from the Sale a Brations catalog! Seriously, it's my favorite time to order, even as a demo.  :-)


Free stuff. Did I mention free stuff? Below are the free items options when you Join My Team
We really have a great team.  It feels family with as much as we communicate with each other whether it be through our page on Facebook, email, workshops or phone.  We get together often to craft, eat pizza,  share ideas and techniques, and eat pizza.  We love our pizza! There's salad there too.  So I've heard.  


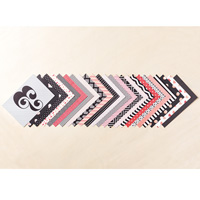
I just couldn't wait to break open all the super adorable Valentine's Day stamps! I love love love the "Snuggles and Smooches" set.  The Snuggles and Smooches used below snag me.  I used the hearts framelits for the hearts on the twine.  The super cute paper used for the hearts and background are from the coolest little paper pack ever! It's called Stacked withe Love. I love these little packs! They are well priced, just the right size and so many patterns.  Did you notice the paper? You know what that is! It's chalkboard paper! I can't tell how happy I was that Stampin Up is carrying it now! Even three different colors in chalk ink pads. What!? Yep, its true.  Tell your friends. Go ahead.  I'll wait.


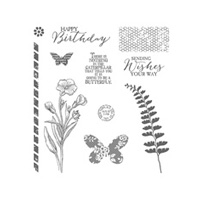
Next up! Birthday card! I can't even begin to tell you about the Butterfly Basics bundle.  If you like butterflies, this is the set.  Check out the stamp below! Cute, right?  The framelits are amazin!  I don't have any pics to post below but that will certainly happen soon. Next post. I promise. :-) The honeycomb type stamp, the stamp next to it and the small circle stamp are also in that set.  I'm sure there are better names for those individual stamps but nothing comes to mind. The dotted paper is from the Painted Blooms Designer Series Paper.  It's quite beautiful.  They originated from hand painted designs and are bright and springtime-y and you almost don't want to use it. Almost. 


Whew! I hope I didn't overwhelm you with the awesomeness happening here!  The holidays bring you great Christmas,  Hanukkah, New Years and Thanksgiving products but when January rolls around, watch out, deals galore! Oh and speaking of deals, don't miss the weekly deals! Every Tuesday, Stampin Up showcases products at a discount. Isn't that great?  Just one more reason to be a part of the Stampin Up family, be it as a demonstrator, hobby demonstrator or customer.  Thank you for visiting!!   


Copyright (c) 2010 BeanieCraft. Design by Wordpress Themes.

Themes Lovers, Download Blogger Templates And Blogger Templates.