I hope everyone has had a wonderful summer! Summer here in SoCal has very kind to us with rain days (weird), beautifully warm days and some hot ones that sent us to the beach! We have nothing to complain about! 😊😊
Onward! Being a cake decorator on the side, I'm always on the lookout for new ideas in decorating. And whoa. Check this out! Stamping with food coloring on fondant AND using wafer paper with stampin Up punched. A whole new world. (Ya, you know you just sang that in your head like Jasmine) 😂
Anyway, I started experimenting. And here's what happened:


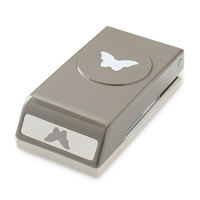
Not too shabby, right? I just finished a fairy cake with a ton of these butterflies so I had to sprinkle them on some fondant for cupcakes. Best idea ever. To get these seriously delicate and fabulous butterflies you'll need some wafer paper. Amazon, Michael's, Joann's or any nearby craft or cake store should carry them. They really are inexpensive. I used cosmetic sponges to brush the wafer paper with food coloring (I use coloring paste. It's thicker and the idea is to not wet the paper too much, it will crinkle) and let dry. Really only takes a few minutes. Than punch away! Your paper, not people.
The stampin was quite the challenge. It takes some finagling(?) but it worked out. I'll probably nix that part from the workshop because it's a little more labor intensive than I expected and save it for orders. Maybe. Ultimately, I popped that bad boy into a cupcake holder, aka throne as I've seen it called, and viola! Sweet little display of yum!

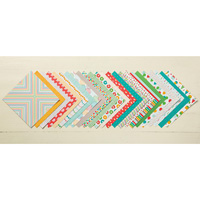
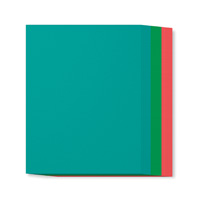
Fun! I found some holders on Pinterest but decided they were too much work for a workshop so I reworked the design and managed to use one sheet of 8 1/2 x 11 cardstock. I used Cherry on Top DSP with matching color coordinated cardstock. Love that they put together packs to match the DSP for those of us that are color coordinating challenged. I said I would.
As I said, start with an 8 1/2 x 11 sheet of Cherry on Top cardstock, choose your coordinating Cherry on Top DSP for the background, one for your bow, and Cherry on Top cardstock for the oval cutouts. Now get started!
Cut you 8 1/2 x 11 sheet on the short side at 5 1/4. This larger piece will be your base. The remaining sheet will be the background piece you'll attach later. FYI, decorate this first. I got a little overexcited, attached it, then carefully peeled it back off. Don't do that.


Score your smaller piece (background piece) at 5 1/2. Set that sucker aside.

Score the larger sheet on the long side at 1", 5", 6", and 10". On the short side score at 1" and 4 1/4". In the end, you should have a score 1" inside each side of the sheet.
I. Love. My. Simply Scored tool.
That is all. Next step----

Cut the score lines on the long sides (both sides) to the 1" score line. See that top part on the opposite side of the circle that you used your circle framelits on your Big Shot to cutout to later be filled with a cupcake? Get rid of those tabs on either side. They just get in the way. Start Sticky Taping! The pic below shows the inside of your box.

This pic below is the outside of your box. Keep it neat.

Time to put together your background any way you choose! These colors are so eye popping and fun to use especially with desserts which are usually associated with parties and that is what we're talking about, right?

Flip open your background piece. Sticky Tape the bottom. You'll need this at the very bottom, on the inside to adhere to the box. Then randomly Sticky Tape the inside.

Alrighty. Start stickin your box together BUT the back flap of your box will be sandwiched between the front and back of background piece. As you bring up this piece after your sandwiching (crafting, food or whatever. We do need to sustain our energy) pull it up to mesh with your box. There should be a strip of Sticky to help is stand up against your box.

See it? Stuck to the box? Easy peasy.

That's it! The base of you project from one sheet of 8 1/2 x 11 cardstock. I'm happy. I hate having a ton of scraps that I can't bring myself to toss and hang on to in hopes of using someday. Somehow.
Here's a list of the products used. Remember, most of these products are one time purchases to use over and over again. I do my best to make the most out of the consumables such as paper, adhesives and accents and certainly love to share my adventures in paper crafting with all you lovelies!
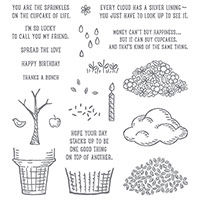
It gets better! I used the Sprinkles of Life photopolymer stamp set for this project. Stampin Up donates a portion of the proceeds to Ronald McDonald House from each sale. Isn't that fantastic! Donating time and/or money makes such a difference in the lives of those struggling in one form or another, whether through Stampin Up or directly to any other reputable organization. As a cake decorator, I feel privilege to be a part of Icing Smiles and to have donated time and cakes to those families and children impacted by critical illnesses. Purchasing this stamp set and donating seemed like a perfect compliment.
Thank you for visiting!
lots of love
Sabrina